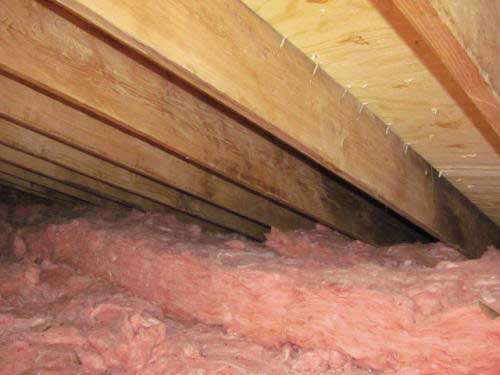
During a recent structural repair, caused by the record snows of 2010-11, we had an opportunity to not only upgrade the roof framing but also the attic insulation as well. This house was built in the early 1980’s and the roof system is a combination of open beam ceiling and attic. The attic had two layers of R-19 fiberglass batts laid on the attic floor with many gaps and missing pieces. Some of the attic knee walls were not insulated and many of the ones that were, rodents had removed much of the insulation. Another issue needing attention was the numerous old recessed lighting fixtures that were not designed to have insulation near the fixture. These old fixtures essentially created uninsulated holes in the ceiling that allowed warm air to easily escape. The insulation strategy was to do as much air sealing as possible to the accessible areas and then install new insulation. Indirectly related to the insulation was attempting to block any rodent access to prevent damage to the new insulation. This was probably going to be the hardest part as squirrels, chipmunks, and mice are very tenacious and we would not have access to every part of the attic area.
The biggest air sealing target was the old recessed lighting. There were a couple of options here. One would be to replace the fixtures with new, sealed, insulation contact fixtures. The other would be to build insulated boxes out of rigid foam insulation and surround the existing fixtures. The insulated box method was chosen for several reasons including cost, more R value (over the top of the fixture) and potentially better air sealing. After the recessed lighting, all accessible gaps at such areas such as roof to wall intersections, wall to wall intersections were filled with expanding foam. Also several standard ceiling electrical boxes were insulated with EnergyBlock insulating blocks
After preventing as much air infiltration as best as we could, we insulated the 2×4 attic knee walls with R-13 fiberglass batt insulation and the attic floor with R-38 blown-in, loose fill fiberglass insulation. The loose fill insulation was chosen for its ability to fill in around complex, cut up framing. After we insulated the attic knee walls with batt insulation, we decided to add 1 ½” rigid foam insulation to the walls. This was done for a couple of reasons. Despite being in the attic, the existing 2×4 knee walls were essentially exterior walls and thus should have been insulated to 2×6 standards (R-19), the additional rigid insulation brought the R value to approximately 23, exceeding the R-19 standard. The rigid insulation helps stop any thermal bridging caused by the wood members at 16” 0n center. The rigid insulation would help prevent air infiltration that still may exist despite our best efforts. Finally, although we tried our best to eliminate rodent access, if any rodents made it into the wall cavity, the fiberglass insulation would be less likely to be completely removed (although it still would be compromised).
Because of several reasons including budget restraints, a whole house pressure test (blower door) was not done. In retrospect, I wish we had done the blower test as the results would have been quite interesting. I’m sure the house would have tested as very “leaky” before the insulation upgrades and “less leaky” after. Before we did the insulation upgrades, the temperature in the attic was similar to the upstairs interior temperature (not a good thing). After installing the new insulation the attic was substantially colder than the interior, meaning the heat was staying where it should instead of escaping into the attic and disappearing.
The homeowner claims the house is more comfortable and feels tighter. He is also monitoring energy usage although it may take a couple of years to get good data supporting decreased energy use.


Leave a Comment